Reading a barometer is like unlocking a secret weather map. If you hike remotely, knowing what air pressure is doing can mean the difference between dry boots and a soaked scramble. Take control with simple steps that forecast the next move nature is making before it hits.
In the backcountry, weather isn’t just a talking point – it is a genuine risk. Whether you’re climbing steep ridgelines in Tasmania or tracing wild tracks in the Grampians, storms can roll in fast and without warning. But here’s the kicker: air pressure shifts always give you a heads-up.
This is where the barometer becomes your best mate. It is not just a gadget; it is a forecast in your pocket. Used right, it will give you the edge you need to reroute early, find cover, or power through before the skies turn nasty. In this guide, we will unpack the basics, offer practical field strategies, and get you fluent in reading pressure like a pro.
Trouble’s Brewing: Learn the Signs Before the Storm Hits
How to interpret barometric pressure changes
Barometric pressure does not change randomly. It is nature’s own notification system, telling you what is coming if you know how to listen.
Pressure readings around 1020 hPa usually indicate stable, fair weather, while values below 1000 hPa often signal an approaching front.
Falling pressure = incoming trouble
When the needle starts dipping, expect deteriorating conditions. A rapid fall – especially 4 hPa or more in under 3 hours – is often a sign of a cold front or storm cell on the move. It is not the time to stretch your luck. Make a call: push through or pause.
Plateaus = stay alert
If pressure drops then stalls, it is not relief – it is suspense. A plateau after a fall often means the storm is gathering force. Use this time to pitch a tent, prep gear, or descend to safer ground if you’re exposed.
Pair it up for precision
Barometers shine brightest when combined with GPS altitude and compass data. Adjust your barometer reading as you gain elevation since pressure naturally drops as you climb. Use historical readings to see the weather trend over 6 to 12 hours. A digital altimeter-barometer combo gives you these reads in seconds and that can save hours of stress.
Practice Makes Predictable: Master Your Barometer in the Field
Hands-on tips to sharpen your storm detection skills
It is one thing to understand the theory. It is another to make it second nature in the wild. Here’s how:
Start at home: calibrate your device
Before your boots hit dirt, set your barometer. Use known altitude from a map or GPS and match it on your device. This ensures your pressure readings reflect actual shifts in the weather, not just changes in height.
Log it like a weather nerd
Track pressure every few hours on the trail. Write it in your trail journal, note the weather, and observe. Is a 1008 hPa reading always followed by grey skies the next day? Patterns emerge faster than you think.
React, don’t just record
When pressure shifts, take action. Reassess your route, check your map for bail-out options, and plan shelter. That 10-minute check-in might be the most important part of your entire day.
Bonus Tip: Use sunrise pressure for quick reads
If you record pressure first thing in the morning and again at midday, you will often see the day’s trend early. A morning rise usually means fair weather is holding. A drop can give you a solid half-day’s notice to make safer calls.
Take time to test in all conditions
Don’t just use your barometer on sunny days. Test it in rain, after sunset, and during windy mornings. The more varied your experience, the sharper your intuition becomes. Reliable judgement often starts with repetitive practice in imperfect conditions.
Survival Isn’t Luck – It’s Preparation and Prediction
Build your backcountry weather toolkit
Storm safety is not about bravado – it is about systems. The right tools turn a potential disaster into a manageable inconvenience.
Must-have gear for pressure pros
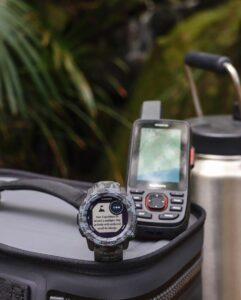
- A reliable barometer or ABC (altimeter-barometer-compass) watch
• Printed topographic maps for reference
• A mechanical compass to verify direction when electronics fail
Offtrack stocks all three, built for harsh Aussie terrain and tested by guides who have spent more time under canvas than in beds.
Turn data into decisions
Pressure is dropping. You have just passed a ridgeline. There is a valley with cover one kilometre off trail. With your tools, you can make the call to descend fast, informed, and ahead of the front.
Pre-trek pressure checks
The night before you hike, check the regional pressure trends. Use tools like the BOM synoptic charts or a weather radio. Combine that with your barometer’s forecast function and you will be starting with eyes wide open, not in the dark.
Pressure Questions Hikers Always Ask
What’s a safe pressure range for hiking in the Australian bush?
Stable readings between 1010 and 1020 hPa usually signal fair weather. Anything under 1000 hPa could mean a front is on the way, time to reassess.
Can I use a smartwatch barometer for serious hiking?
You can, but know its limits. Battery life, screen visibility, and calibration can vary. They are brilliant for day hikes or supported treks but always carry a backup if you are heading remote.
How far in advance can barometers predict bad weather?
Depending on how fast the pressure drops, you may get a window of 30 minutes to three hours. Enough time to shelter, reroute, or hunker down if you are paying attention.
Read the Sky Before It Speaks
Nature always gives a signal. The trick is knowing where to look. A barometer is not high-tech fluff – it is old-school smarts, retooled for today’s adventurer. When you are remote and the forecast does not cover your ridge or riverbend, your barometer becomes your lifeline.
So do not just pack it, learn it. Use it. And stay Offtrack, with confidence.
Explore Offtrack’s full range of weather and navigation tools now and beat the storm before it brews.
Let’s get Offtrack – smart, safe, and storm-ready.