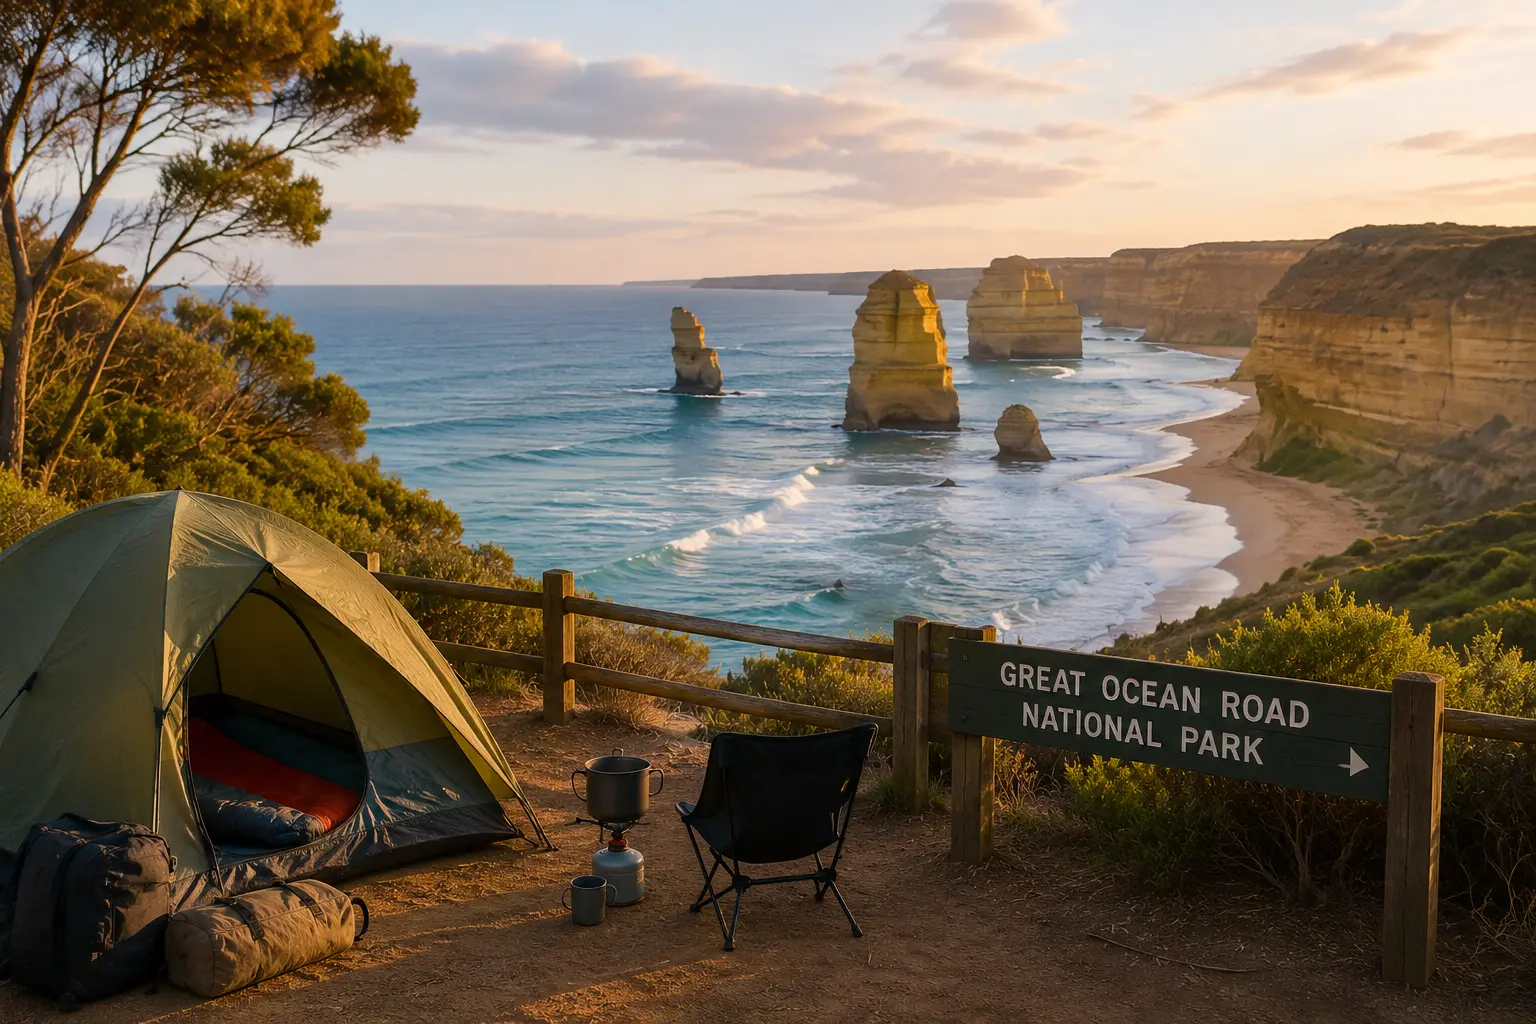
The Great Ocean Road can feel like an easy choice for a family camping weekend. The drive is manageable, the scenery provides plenty to see and do, and camping options range from established holiday parks to more exposed coastal sites.
Then the wind arrives.
A tent that felt spacious in the showroom can become harder to manage when broad walls catch every gust. Rain can turn the area outside the entrance into a muddy traffic zone. Chairs disappear beneath wet jackets, cooking equipment spreads across the table, and sleeping bags start picking up moisture each time someone climbs inside wearing damp clothes.
The answer is not to fill the car with every piece of camping gear you own. It is to build your setup around the campsite, expected conditions and the way your family will use the space.
At Offtrack, we start with the trip rather than assuming one tent, sleeping bag or camping setup will suit everyone. Campsite exposure, group size, vehicle space and the equipment you already own all affect what makes sense.
A simple way to prioritise your setup is to match the gear to the problem it needs to solve.
| Camping challenge | Gear to prioritise | What to look for |
| Wind and exposed sites | Tent, pegs and guylines | Stable structure, secure guying points and pegs suited to the ground |
| Rain and wet entrances | Tarp and vestibule space | Reliable runoff, protected entry space and adjustable pitching options |
| Cold or damp nights | Sleeping mat and sleeping bag | Ground insulation, suitable warmth and dry sleepwear |
| Limited vehicle space | Compact furniture and sleep gear | Useful packed size without sacrificing essential comfort |
| Family organisation | Storage, table and dry bags | Clear zones for food, wet clothing, lighting and frequently used gear |
Start With a Shelter That Will Still Work When the Weather Turns
Your tent sets the limits for the rest of the campsite. If it stays stable, dry and properly positioned, everyone has somewhere to retreat when the weather closes in. If the shelter struggles, everything else becomes harder to manage.
Choose the Tent for Exposure, Not Just Floor Space
Family tents are often compared by sleeping capacity, but that figure tells only part of the story.
Consider how the tent will behave in wind, how much protected storage it offers and whether everyone can move around without stepping over wet equipment.
For a short stay at a sheltered holiday park, generous standing room and a larger living area may improve comfort. A more exposed coastal campsite can shift the priority towards a lower profile, secure guying points and a structure suited to the expected conditions.
The vestibule or covered entrance is also worth checking. A practical vestibule gives you somewhere to remove wet shoes and store damp jackets without bringing everything into the sleeping compartment. It also helps stop bags, towels and footwear from blocking the doorway.
Ventilation matters in cool or wet weather as well. Closing every vent may seem sensible, but breathing and damp equipment can increase moisture inside the tent. Controlled airflow can help manage condensation while keeping the interior protected.
The right tent is therefore less about choosing the largest option and more about matching the shelter to the campsite and the way your family camps.
Pegs, Guylines and Ground Protection Are Part of the Shelter
A tent is not finished when the poles are standing.
The supplied pegs may work well on ordinary ground, but campsites can include softer soil, harder surfaces or ground where standard pegs struggle to hold. Carrying pegs suited to the conditions can help keep the tent correctly tensioned.
Set the guylines while conditions are manageable rather than waiting for stronger wind or rain. Proper tension helps distribute pressure across the shelter and reduces repeated loading on the tent structure.
A groundsheet can protect the tent floor from abrasion and moisture, but position it carefully. It should not extend beyond the tent floor where it can catch runoff and direct water underneath.
Keep a small shelter repair kit somewhere accessible. Repair tape, spare cord and any repair components recommended for your tent can make a damaged part easier to manage during the trip.
A Tarp Can Save a Wet Weekend, but Only With the Right Pitch
A tarp can be one of the most useful additions to a family campsite when rain is expected. It can provide a protected entrance, covered meal space or somewhere to handle wet equipment without opening the sleeping tent.
It can also catch a lot of wind.
The tarp itself is only part of the setup. Poles, cord, suitable pegs and adjustable tensioning points all affect how useful the shelter will be when conditions change.
Match the Pitch to Wind Direction and Daily Camp Use
Before raising the tarp, decide what you actually need it to protect.
Covering the tent entrance may be more valuable than creating a large detached dining area. In exposed conditions, a lower and tighter pitch can also present less surface area to the wind than a high, flat canopy.
Long-term Bureau of Meteorology records from Cape Otway Lighthouse show an average of 180.8 days of rain each year, while mean wind speeds are about 24.7 km/h at 9 am and 24.9 km/h at 3 pm. These figures help explain why shelter setup, drainage and secure pitching deserve particular attention when camping around exposed parts of the Great Ocean Road.
Give rain somewhere to drain. Flat sections can allow water to collect, causing the fabric to sag and adding load to poles, pegs and attachment points. A clear slope or drainage point helps water leave the tarp rather than sit on it.
Pay attention to where that water goes. Runoff should not pour into the tent entrance, across a busy walking route or beneath the area where chairs and equipment are stored.
Check the setup after heavier rain or stronger gusts. Wind direction can change, the ground can soften and wet cord may need retensioning.
Pack the Components That Make the Tarp Usable
A tarp without enough cord, suitable supports or secure fixing points has limited value.
Carry the poles or supports required for your intended pitch, along with spare line and the equipment you need to secure it. Adjustable knots or tensioners can make changes easier when the weather shifts.
Practise your preferred setup at home before the trip. You will quickly discover whether the cord is long enough, whether the poles suit the layout and whether the tarp covers the area you expected.
That small rehearsal can save considerable frustration when you arrive at camp in poor weather.
Build a Sleep System That Separates You From Cold, Damp Ground
Sleeping bags tend to receive most of the attention, but the mat underneath matters too.
A sleeping bag helps limit heat loss to the surrounding air. The mat provides cushioning and reduces heat transfer into the ground. A warm sleeping bag paired with an unsuitable mat can still leave someone uncomfortable overnight.
Your Mat Does More Than Soften the Ground
For family camping, mattress choice involves more than thickness.
Consider insulation, durability, packed dimensions, inflation method and the floor space available inside the tent.
A thick mat may provide excellent comfort but take up considerable vehicle space. A lighter air mat can pack smaller but may need more care around sharp objects. Foam and self-inflating options can suit campers who place greater value on straightforward setup or durability.
Inflate each mat before the trip. Check the valve, pump or inflation bag and leave the mat inflated long enough to identify an obvious leak.
Keep the appropriate repair materials with the sleeping equipment.
For younger campers, consider the whole sleeping area too. A comfortable mat will not help much if the sleeping bag is pressed against a wet tent wall or damp clothing is piled beside the pillow.
Select Sleeping Bags for the Coldest Likely Night
Daytime conditions do not always reflect how cool a campsite may feel after sunset, particularly when wind and damp weather are involved.
Choose a sleeping bag suited to the conditions you reasonably expect and remember that different people experience temperature differently.
Down and synthetic sleeping bags suit different priorities. Down can offer strong warmth for its weight and compress well. Synthetic insulation can be a practical option where damp conditions, regular family use, budget or straightforward care are important considerations.
Neither choice is automatically better. The most suitable option depends on how and where it will be used.
A sleeping bag liner can help keep the bag cleaner and may provide some additional warmth, but it should not compensate for an unsuitable sleeping bag or mat.
Keep sleepwear dry until bedtime. Changing into dry base layers and socks helps stop moisture from wet clothing entering the sleep system.
Keep the Family Comfortable Without Filling the Entire Car
Camp furniture can make a family trip much easier, but it can also consume a surprising amount of vehicle space.
The aim is not to recreate the lounge room. Give everyone somewhere stable to sit, prepare food and keep frequently used items organised.
Choose Camp Chairs for the People Using Them
A comfortable chair for one person may be awkward for another.
Seat height, back support, stability and ease of getting in and out all deserve consideration, particularly for children, older campers or anyone with limited mobility.
Check the packed dimensions before buying several chairs. Four bulky chairs can occupy more space than expected, while very lightweight chairs may need to be folded or secured when wind picks up.
Also consider how the chair handles wet weather. Fabrics that retain water may stay uncomfortable after the rain stops, while quick-drying materials can make campsite life easier.
Compare chairs according to the people using them, available vehicle space and the type of camping you plan to do rather than focusing on weight or size alone.
Create One Functional Table Zone
One organised table can stop equipment spreading across the campsite.
Use it for food preparation, lighting and the items needed regularly during the day. Keep enough surface clear for the table to remain functional rather than allowing it to become permanent storage for jackets, mugs and packets.
Store light items in tubs or bags where they are less likely to blow away. Position the table near the kitchen area without blocking the tent entrance or the main route between the shelter and vehicle.
Defined campsite zones become particularly useful in bad weather because everyone knows where wet clothing, food, lights and essential equipment belong.
Plan Water and Cooking Around the Campsite, Not Assumptions
Do not rely on assumptions about campsite water.
Check the facilities available at your chosen campsite before departure and plan storage around the number of people travelling, trip duration, expected conditions and cooking requirements.
Use Water Drums You Can Handle Safely
Larger containers hold more water, but they also become heavier and more awkward when full.
Several manageable containers may be easier to carry, position and pour than one oversized drum.
Secure water containers in the vehicle so they cannot move freely during the journey. At camp, place them on a stable surface where they can be used without turning a busy walking area into wet ground.
Water storage and water treatment are separate considerations. A container stores water. Filters and treatment methods address water quality.
If you expect to rely on untreated water, choose any treatment equipment according to the expected source and the manufacturer’s instructions rather than assuming one method handles every possible risk.
Make Wet Weather Meals Easy to Manage
A complicated meal plan becomes much less appealing when the weather deteriorates.
Choose meals that need limited preparation, use cooking equipment you already know how to operate and keep washing up manageable.
Store ingredients and cookware in weather-resistant containers so you do not need to unpack the entire kitchen at once.
Always use cooking equipment according to the manufacturer’s instructions and any rules or restrictions that apply at the campsite. Keep combustion appliances out of tents and enclosed sleeping spaces.
If a tarp is being used around a cooking area, maintain appropriate airflow and clearances for the equipment in use.
Set up the cooking area before dark and keep a dedicated light source nearby.
Dress for Wind and Rain Before Adding Extra Camp Luxuries
Dry clothing can improve a difficult afternoon faster than another piece of campsite furniture.
A simple layering system gives each garment a purpose. A base layer manages moisture close to the skin, a mid layer provides insulation and an outer layer protects against wind and rain.
Layers can be added or removed as conditions change, making the system more adaptable than relying on one heavy garment.
Keep a Dry Set for Camp and Sleep
Keep dry base layers, socks and sleepwear protected for camp and bedtime.
Waterproof jackets and warm layers should also be easy to reach rather than buried beneath sleeping equipment.
Separate wet and dry clothing where practical. Dry bags, pack liners or sealed tubs can help prevent one soaked jacket from spreading moisture through the rest of your gear.
Give Children More Margin Than Adults
Children can become wet through play long before the rain becomes heavy.
Extra socks, base layers and dedicated dry sleepwear give families more room to deal with wet conditions without compromising the night’s sleep.
Layering can also make clothing easier to adjust throughout the day. If one item becomes wet, it can be changed without replacing the entire outfit.
Assigning each person a storage area can make a surprisingly large difference when several people are sharing a tent. It reduces time spent searching for clothing while the door is open and rain is coming in.
Pack the Small Items That Prevent Large Campsite Problems
A compact backup kit should cover the failures and inconveniences most likely to disrupt the trip:
- Spare pegs and guyline
- Tent and mattress repair materials
- Head torches with backup power
- Dry bags, pack liners or sealed storage
- A stocked first aid kit
- Weatherproof outer layers
- A suitable peg mallet
- Rubbish bags
- Water containers
- Cleaning and drying cloths
Keep the kit accessible.
Repair tape or a head torch at the bottom of a fully packed car is much less useful when you need it during setup.
Run a Five-Minute Campsite Check Before You Settle In
The first few minutes on site can shape the rest of the stay.
Look at the ground before unloading. Avoid obvious low points and visible drainage channels. Check the wind direction and consider how it may affect the tent entrance, tarp and cooking area.
Separate the campsite into practical zones. Decide where people will sleep, cook, sit, store wet equipment and move between the vehicle and shelter.
Secure the tent and tarp while conditions are manageable. Position the water, organise the kitchen and place lights before dark.
Keep rainwear somewhere it can be reached without opening several bags.
A few minutes spent organising the campsite early can save a much more difficult rearrangement once rain or stronger wind arrives.
A Better Setup Starts With the Trip, Not a Generic List
The best gear for a Great Ocean Road camping trip depends on the campsite, expected conditions, family size, trip length, vehicle space and equipment you already own.
Start with shelter. Build a sleep system that protects you from the ground as well as the surrounding air. Add furniture that earns its space, manageable water storage and clothing that leaves everyone with something dry for camp and bedtime.
Most families do not need more gear. They need equipment that works together.
If you are unsure what suits your trip, contact Offtrack with your campsite, travel dates, group size, available vehicle space and the equipment you already own. We can help narrow down suitable tents, tarps, sleeping gear, camp furniture, kitchen equipment and water storage without assuming one setup works for every family.
Frequently Asked Questions About Great Ocean Road Camping Gear
Do I need a heavy-duty tent for every Great Ocean Road campsite?
No. Different campsites and conditions place different demands on a tent.
A more sheltered campsite may allow you to prioritise living space and convenience, while greater exposure can make shelter stability and secure pitching more important.
Choose according to the campsite, season, group size and expected conditions rather than assuming the heaviest tent is automatically the best option.
Is a tarp worth taking for a short family trip?
It can be, particularly if it provides a dry entrance or useful shared space during rain.
Its value depends on having the poles, cord, pegs and knowledge needed to pitch it properly, so treat those components as part of the shelter setup rather than optional extras.
Should I prioritise a warmer sleeping bag or a better mat?
They solve different problems.
The sleeping bag helps insulate you from the surrounding air, while the mat reduces heat loss into the ground. Review both parts of the sleep system before upgrading either one.
How much water should our family carry?
There is no single quantity that suits every trip.
Base your plan on the number of travellers, trip duration, expected conditions, meals and confirmed campsite facilities. Include an appropriate reserve and choose containers you can safely handle when full.
Are lightweight camp chairs suitable for windy sites?
They can be comfortable and convenient to pack, but light chairs may need to be folded or secured when not in use.
Compare stability, support and packed dimensions rather than focusing on minimum weight alone.
What should stay dry at all costs?
Prioritise sleeping bags, sleepwear, insulating layers, electronics, first aid supplies and other equipment that could become difficult to use when wet.
Keep essential dry equipment separated from wet shelters, towels and outer clothing where practical.
Can Offtrack help narrow down the setup?
Yes. The most useful starting point is your campsite, expected conditions, family size, available vehicle space and the equipment you already own.
That gives the team a clearer basis for comparing suitable options than a generic family camping checklist.